Category: Tutorial

Doll Mei Tai Carrier Tutorial AND Free Pattern!

IshouldhavesewnDollyMTPattern

I am a baby wearing junkie. While I have only a few carriers mostly made by me, I wear my girls as much as I can especially when out running errands or during family time. My usual carrier is a Full Buckle Soft structure carrier. It seems that my babywearing has worn off (hahah Pun intended) on Venom. She usually brings me a scarf and asks me to help her wear her babies. I decided that I would make her a Mei Tei for her dolls so that she could have a carrier too. I plan to make her a Buckle eventually but she’s in love for now. She’s spent the day carrying her Rainbow Dash around while building with her legos.

Without further ado, the Tutorial.

Dolly Mei Tai Tutorial

This pattern/ Tutorial is for personal use only. Do not Copy or redistribute for profit.

First: Make sure to prewash, dry and iron your fabrics. This helps preshrink and get the chemicals from milling out of your fabrics. Sew all pieces with a 1/2″ seam allowance.

2nd: Cut 2 body pieces (one inner and one outer), 4 hood, 2 straps and 1 waist tie. Pattern pieces are found here. Body Pieces shows seam allowance and needs to be cut on outer black line.

3rd: Fold and Pin straps in half. Make sure to copy the turning hole marks on the waist strap. Trim at corner points. Then turn making sure to poke the point out using a blunt object. (I use a double point knitting needle or a chopstick. A seam ripper can be used but care must be taken to make sure to not rip a hole in the ends.) Press straps.

4th: Topstitch the arm straps. Do not topstitch waist, that will come after the body is sewn.

5th: Pin straps to the right side of one body piece. Leave 2 inches overhang so that we can secure them with Xboxes after turning. Pin the excess strap down to the body piece. This keeps them from getting caught under your presser foot.

6th Pin hood pieces right sides together and sew, Repeat for both the inner and outer. Pin right sides of outer edge together and sew. Press the seam allowance open and then turn right sides out and topstitch edge. Pin body piece between the straps.

7th: Pin Body pieces right sides together and sew around it. Trim corner points. Then turn and press. Find center of bottom edge and pin to center mark on waist strap. Body piece should be 1 inch inside waist strap. Pin in place and make sure that your seam allowance is all tucked in

8th: Topstitch around waist strap. Trim all threads and add tag (optional)

9th: (optional) Sew Xboxes where straps are sewn on.

If you can’t sew and wish to get your Little one a Carrier, you can find them at https://www.SewAnnaButton.com

Tutorial: Ipod Charging Cozy

Recently, I’ve become addicted to Pinterest. I orginally found this project on there but the tutorial and whole blog are in German. So I decided to help another online friend out and make my own version/tutorial for her.The Tutorial is after the jump, due to lots of Pictures.
Tutorial:

Supplies:
Fabric (I used a scrap from my Diaper Bag and some black swirls.)
Heavy Interfacing
Ruler
pins
Tailors chalk or a pen.
Sewing machine
Scissors

Project time is about 30mins

Directions:

First, Gather your supplies and make sure your fabric is pressed( I skipped this step as I was trying to finish this during nap time. It didn’t end up happening though)

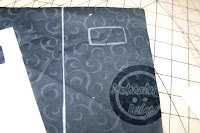
Next, On your interfacing, measure a rectangle of 6.5″x 3.5″ (you can make it longer if you’d like. In hindsight I wish I would have just a bit.) Then measure 3/4″ from the top and both sides Marking the lines, them mark 1-3.4″ from the top. This gives you the cut out to go around your plug. Cut this out. Set aside for now.

Next, mark your cotton 7.5″x 4.5″ (or whatever length you made yours) Mark your plug hole on here as well.

With Right Sides together Pin and sew around the plug hole. Cut out hole leaving a Seam Allowance.

 Next Your going to cut out your pocket, Mearsure 5.5″x 8″ hem the top. Fold in half and mark 2″ from the fold on both sides. fold on marks and stitch as close to edge as possible to create pintuck. Set aside.

Now comes the tricky part. Grab the bottom of one piece and push it through the plug hole. this will cause the right sides to be facing out. Press and then Place interfacing by threading one side through the cut out. Pin in place and topstitch.

Now Pin in 1/2″ on the top and sides. leave the bottom alone for now. Take Pocket pieces and center it on the bottom portion. Tuck in 1″ of pocket piece in to seam on both sides. Sew around leaving 1″ from bottom unsewn.

Pin Pintuck to side. pin in bottom making tiny pleat in center of pocket piece. Topstitch. Then enjoy!

HelloKendra13.blogspot.com

The Nursery Part One

Firstly, I want to take a quick second to say Hello to all my new Friends (Followers). Thank you for taking time to read my humble little blog and please don’t be shy, I love to interact and chat with all of you.
Now that we’re moved and mostly settled its time to start working on the Lair (Aka. the Nursery). While I’m not planning to paint and go overboard ( As we’ll be PCSing next Oct.). I do plan on making it look as lovely as I can. I went fabric shopping on Black Friday at JoAnn’s thanks to a 20% off coupon, a 50% off coupon, and most things being marked down. I got all of the material I need (as well as some from my stash) to make all the nursery decor.
The Quilt is going to be in various prints and shades of black, grey and whites. I blogged about the pattern I chose not to long ago. Its called “spiderwebs”. Bumpers will be used but I’m making them thinner than normal bumpers. I found Lime and white Houndstooth flannel for $1.25 a yard. So I bought the whole bolt. Its going to be the Inside print to the bumpers, back of the quilt, and valance for the window.
IKEA Somnat Crib.
We’re getting our crib from Ikea. Its the Lime green Somnat. It worked out perfectly that My Mum in Law and Little Sis in Law are flying in to Orlando for the Holiday and there just so happens to be an Ikea there for us to pick it up. I’m over the moon about getting the crib that I want and for such a great price. It is a nonconvertible crib, which is what I wanted due to us wanting to have more than one child.
All artwork for the walls is going to be original pieces drawn by me. My sketch pad has been by my side a lot lately plus it gives me something to do at doctors appointment and when I’m laying on the couch at night.
I have to put a few things on the back burner until Little Venom arrives. Like the Monogram letters, and adding a few gender specific things (and lets not for get the Tutu making if Venom turns out to be Miss Venom.) I’m adding a Link to my Nursery to do list under my Header so you can follow along with my Nursery related post and Progress.
HelloKendra13.blogspot.com